Method 3: Using CSS
The instructions that follow indicate how to make the required layout using CSS. As was indicated in last week's work, it is advised to use CSS, as it is now recognised as being a preferable way to build websites. Note that you only need to create the CSS file once, and apply it to each page. The CSS planning could be incorporated into the whole site planning process.
Using KompoZer, the following is provided as a guide to making the site using CSS. Movies of this procedure is also available. Please note that you should check that what you are producing matches the Design Specifications, and you should not just blindly follow the procedure outlined here.
- Open the CSS Editor

-
Click
on the button that says Create Style Rule. Then
click on:
Export stylesheet and switch to exported version
- Save the stylesheet as joes.css
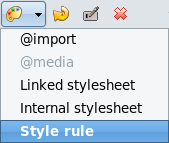
- Create a new Style Rule by clicking on the Styles button inside the CSS stylesheets dialogue box (and selecting Style Rule if choosing from the drop-down box).
- With the button selected for “style applied to
all elements of type”, choose “body”
from the drop down list, and click on Create style Rule.
- Choose the Text tab and select predefined: Arial, Helvitica, sans-serif.
- Choose a Background colour of light green.
Style Rule for the Banner
Again click to create a new Style rule. This time it will be
for a class which we will call “.banner”. So this
time the Dialogue box will look like this before you click on Create
Style rule. 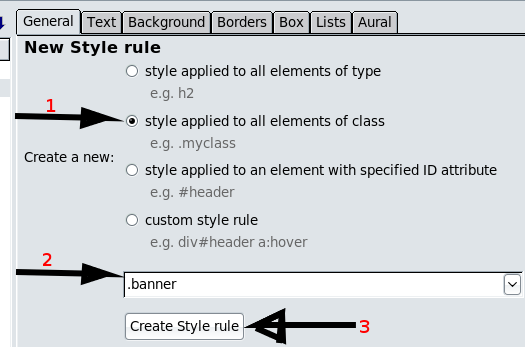
- In Text – Choose Font weight of Bold, Alignment Center; Font size of 40px, Colour Dark Green
- Background – colour grey; Image selected as the strawberry from the images folder (inside the site folder); Tile – don't tile; Position – Left and Center (vertically).
- Borders – All four sides the same – Style double, Width 5 px, Colour dark green
- Box – Width 80%; Left Margin 10%
Navigation Style Rule
Now create a Style applied to an element with specified ID attribute. We will call “#nav” (this is the identifier ID for the element). This style rule will tell the navigation bar sit to the left of the content, with a little space around it. The other navigation bar styles will be based on this...
- Box – Float – left, Margins 8px for each.
Custom Style Rule for Navigation Bar linked elements
Create a custom style rule for an element with the ID “#nav a”. This covers what the navigation bar look like due to the fact they are linked.
- Text – Font weight Bold, Font size 16px, Line height 24px, Color – dark green, Text decorations – none.
- Background – colour – pink, Image – choose the strawberry from the site's images folder, Tile – don't tile, Position – Left and Center vertically.
- Borders - Solid 4 px Red.
- Box – Display Block, Width 80px; Paddings – Top 5px, Right 5px, Bottom 5px, Left 25px.
Custom Style Rule for navigation buttons when mouse hovers over
Create another custom style rule for an ID which we will call “#nav a:hover”. This is the style that will be followed when the mouse hovers over each navigation button.
- Text – Font size 18px; Colour white.
- Background – Colour Dark green (no image).
Similarly you should also create a style rule for Content, where the Box attributes will be Block and Margin left 125px.
When you have finished click on OK. The you are ready to apply the styles and edit the site.
Applying the Styles
- On the index (home) page type the heading – do not worry about the formatting for now. Start a new line, type each menu bar item on that same line (It will look like this: Home History Fruit Veggies Flowers Specials). Again, do not worry about styles or formatting for now. Finally on another line type the Word Content as a representation of where the content for the site will go.
- Select the heading text, then from the Styles drop down box, select Generic container (div). Then from the class menu choose .banner as the class. It should automatically make the text a heading with the desired formatting. Then
- select all the text for the navigation bar, but not the word Content. Then select the Generic container (div) from the Style drop-down box.
- Right click on the div tag in the status bar (near the bottom left corner) and choose ID→ nav. This then applies all the navigation styles from the style sheet (joes.css) to the navigation bar. However, it will not show up yet as the style sheet only applies it when they are links.
- (If you had not created a file for each of the other pages in the site (history.html, fruit.html, veggies.html, flowers.html and specials.html, then save this file as each of them to create them with this structure.)
- Link each text on the navigation bar to the appropriate page of the site. As they are linked, the Style sheet will be applied to make them buttons as required. (If not the css file can be edited using caScadeS) again.
- Choose the word Content, and Select the Generic container (div) from the Styles drop-down box.
- Right click on the div tag in the status bar (bottom right corner) and choose ID→ Content.
- If the page looks as you would expect, and satisfies the Design Specifications, then save the file to each of the files in the site.(history.html, fruit.html, veggies.html, flowers.html and specials.html).
- Each page should then be edited. The Title, Heading and Content should be changed on each page.